When you are growing up, everyone tells you that time will go faster as you get older! Did I believe them?? Not one bit! How could time go faster?? Summers were already too short and fast! School started sooner than we wanted and the carefree days of summer - just gone!!! Gone too fast!! And before you know it, it's September!
Can you believe it's September??
Again - where did the summer go??
Again - gone too fast!
But now it's September!
Beautiful September! The perfect month. Beautiful warm days with just a hint of cool in the background. Cool nights - perfect for sleeping! The mornings and evenings are perfect for sitting on the patio and just enjoying the time!
Thanks for stopping by ~ Enjoy your September!
Showing posts with label fall. Show all posts
Showing posts with label fall. Show all posts
Saturday, September 6, 2014

Sunday, August 17, 2014
August Card Club
Wow it was fun to see everyone after taking a month off to take care of family things and take some family time! We took the grandchildren, son and daughter-in-law to the beach for a few days! I had so much fun! I hope they did too!
 But getting back to my routine is nice - and I missed all my friends! With a slightly different format beginning with the new Close to My Heart Annual Inspiration (wow!!! I love the new idea book!) we started by learning a new technique, and reviewing one that we had done before.
These techniques will be done and/or reviewed each month and put on a "Technique Ring", then if anyone (including me) feels the need for some inspiration you can go to your 'ring' and choose one. I do have to thank my friend Adel for this wonderful idea. She is awesome for sharing this idea and letting me 'case' it! (copy and share w/everyone).
Our first technique (bottom) was the new 'painter tape' technique. Isn't it great?? And super easy, just use it like a stamp! The second is sanding on a dry embossed surface. Just as easy as it sounds!
Now for the cards we made with these two techniques.

 Using the painter's tape with new colors Flaxen, Pixie and Thistle, adding a sweet sentiment and some cute black dot flowers then matted it with black. I love this quick easy and fun card.
The dry embossing was done on Lagoon cardstock and with our white core it looks amazing sanded. Diagonally cut the dotted 'Seaside' paper and layer it on top. For a little contrast we used Thistle ink to stamp the sentiment on the circle (keeping with the dot format) and tied a cute bow on the side with the new Thistle diagonal stripe ribbon.
The third and fourth cards didn't really use any specific technique but they were equally fun to make!

Both of these cards were made using the Pathfinding paper pack. What a wonderfully versatile paper pack. The card on the left is what I like to call a 'tucker' card. It is small enough to 'tuck' into a coat pocket, a lunch box, a suitcase. . . well you get the idea! And yet it is big enough you could mail it if you wanted. Finished size is 3 1/2 x 3 1/2. And - check out that cute little staple in the upper corner! Fun little accent!
 And What a Hoot!! Our August Stamp of the Month!! Isn't it a hoot? So Adorable! After stamping and cutting him out he was matted on white cardstock that was distressed and sponged along the edges. Along with some Shimmer tape and sequin eyes on his mask he makes an adorable little card.
Thank for stopping by!
Items used in the making of these cards:
Z1924 Dot Embossing folder
X5762 Lagoon cardstock
X7192B Seaside paper pack
X7186B Pathfinding paper pack
Z1990 Thistle Diagonal stripe ribbon
B1467 My Acrylix You Mean the World to Me
Z2640 Thistle ink pad
Z2642 Flaxen ink pad
Z2644 Pixie ink pad
Z2641 Glacier ink pad
D1616 My Acrylix Have a Happy Day
B1462 My Acrylix Lovely Birthday
S1408 August Stamp of the Month - What a Hoot!
Z2012 Gold sequins
Z2449 Cerulean Blue Shinhan marker
Z2461 Peacock Green Shinhan marker
Z2465 Turquois Blue Shinhan marker
But getting back to my routine is nice - and I missed all my friends! With a slightly different format beginning with the new Close to My Heart Annual Inspiration (wow!!! I love the new idea book!) we started by learning a new technique, and reviewing one that we had done before.These techniques will be done and/or reviewed each month and put on a "Technique Ring", then if anyone (including me) feels the need for some inspiration you can go to your 'ring' and choose one. I do have to thank my friend Adel for this wonderful idea. She is awesome for sharing this idea and letting me 'case' it! (copy and share w/everyone).
Our first technique (bottom) was the new 'painter tape' technique. Isn't it great?? And super easy, just use it like a stamp! The second is sanding on a dry embossed surface. Just as easy as it sounds!
Now for the cards we made with these two techniques.
Using the painter's tape with new colors Flaxen, Pixie and Thistle, adding a sweet sentiment and some cute black dot flowers then matted it with black. I love this quick easy and fun card.The dry embossing was done on Lagoon cardstock and with our white core it looks amazing sanded. Diagonally cut the dotted 'Seaside' paper and layer it on top. For a little contrast we used Thistle ink to stamp the sentiment on the circle (keeping with the dot format) and tied a cute bow on the side with the new Thistle diagonal stripe ribbon.
The third and fourth cards didn't really use any specific technique but they were equally fun to make!
Both of these cards were made using the Pathfinding paper pack. What a wonderfully versatile paper pack. The card on the left is what I like to call a 'tucker' card. It is small enough to 'tuck' into a coat pocket, a lunch box, a suitcase. . . well you get the idea! And yet it is big enough you could mail it if you wanted. Finished size is 3 1/2 x 3 1/2. And - check out that cute little staple in the upper corner! Fun little accent!
And What a Hoot!! Our August Stamp of the Month!! Isn't it a hoot? So Adorable! After stamping and cutting him out he was matted on white cardstock that was distressed and sponged along the edges. Along with some Shimmer tape and sequin eyes on his mask he makes an adorable little card.Thank for stopping by!
Items used in the making of these cards:
Z1924 Dot Embossing folder
X5762 Lagoon cardstock
X7192B Seaside paper pack
X7186B Pathfinding paper pack
Z1990 Thistle Diagonal stripe ribbon
B1467 My Acrylix You Mean the World to Me
Z2640 Thistle ink pad
Z2642 Flaxen ink pad
Z2644 Pixie ink pad
Z2641 Glacier ink pad
D1616 My Acrylix Have a Happy Day
B1462 My Acrylix Lovely Birthday
S1408 August Stamp of the Month - What a Hoot!
Z2012 Gold sequins
Z2449 Cerulean Blue Shinhan marker
Z2461 Peacock Green Shinhan marker
Z2465 Turquois Blue Shinhan marker
Sunday, November 10, 2013
Stampers with an Attitude Blog Hop! Gratitude with Attitude!
Welcome to the Stampers with an Attitude Blog Hop! The blogger in
front of me is Angela Garcia.
The Stampers with an Attitude are excited to show you our Gratitude with an Attitude artwork , so here we go.
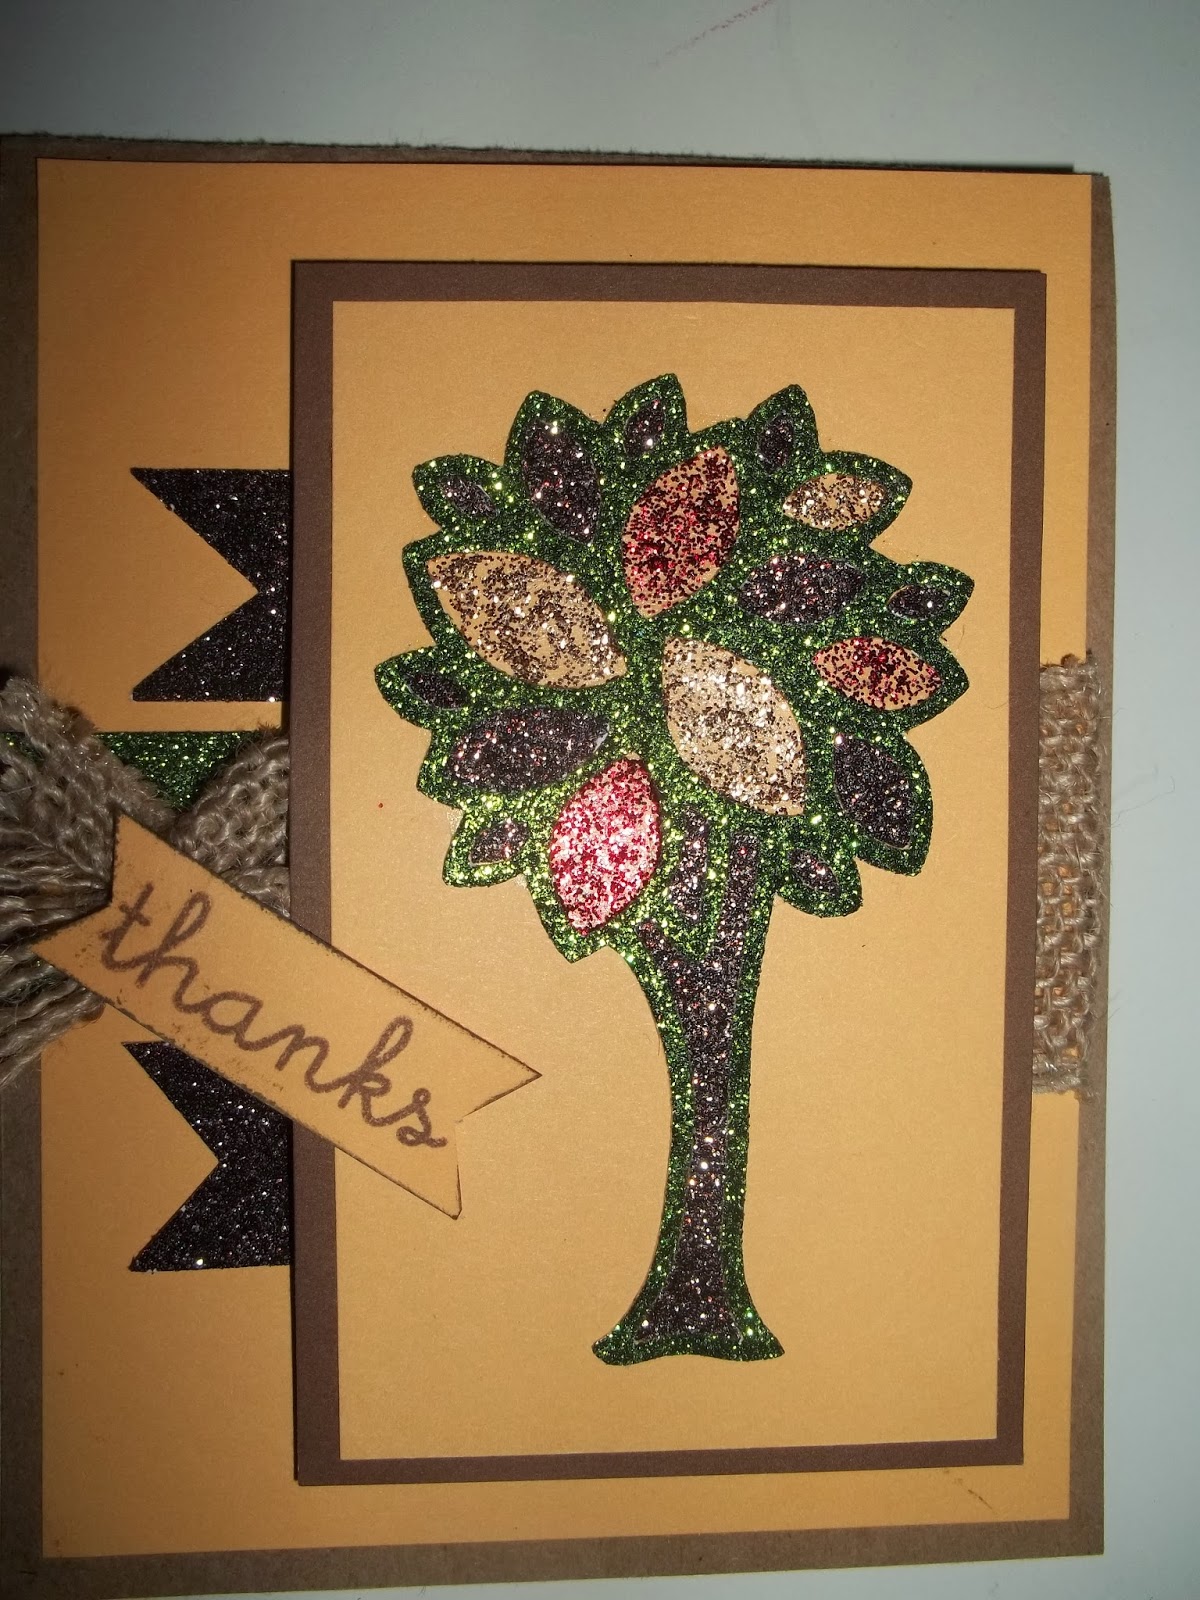
My card was inspired by the scrapbook cover on page 130 the Close to My Heart 2013 Fall and Winter Idea Book.
 Using our new Artbooking Cricut cartridge (Z1906) I cut out the awesome tree shown on page 72, using the Brown and Tan (Z1830) and Green (Z1847) glitter papers. The trunk and some of the leaves from the Bronze glitter tree were used to fill in the trunk and some of the leaves. The remaining leaves were filled using Red Glitter Gel (Z1484) and Almond Glitter Gel (Z1769). Saddle (X5928) was used for the card base and Creme Brulee (X5754) is the accent color.
I love the contrast between the Burlap Ribbon (Z1760) and all the 'Glitter' on this card.
The next blogger on the hop is Sandra VanWoerden
Have fun and Thanks for stopping by ~
The Stampers with an Attitude are excited to show you our Gratitude with an Attitude artwork , so here we go.
My card was inspired by the scrapbook cover on page 130 the Close to My Heart 2013 Fall and Winter Idea Book.
I love the contrast between the Burlap Ribbon (Z1760) and all the 'Glitter' on this card.
The next blogger on the hop is Sandra VanWoerden
Have fun and Thanks for stopping by ~
Sunday, August 11, 2013
Stampers With An Attitude New Product Blog Hop!
Welcome to Becky's Studio! And Welcome to the Stampers with an Attitude Blog Hop! The Stampers with an Attitude are
excited to show you some Artwork with an Attitude using product from our
new Autumn/Winter Idea Book. So grab your coffee, maybe a cookie or some chocolate, sit back and have a fun journey.
The blogger in front of me is Pamela O'Connor . Great work Pamela, thank you for sharing your talents. If you got here from her blog, you are on the right track.
We have so many wonderful new products in this Idea Book and I have been having so much fun jumping from one product to another, and one paper pack to another - BUT -
I am totally in love with the new 'Baby Cakes' paper pack (X7073B)! It is so cheerful and fun and so versatile! As you will see, I got a little carried away using it! But I just couldn't help myself.
First of all with the name Baby Cakes it just lends itself to 'Baby' cards! Right?

I used Baby Cakes polka dot paper on this card along with some embellishments made from our new 'Artbooking' (Z1906) Cricut cartridge. What a fun cartridge!!! Don't you just love that darling Giraffe? So so cute - and can be used for a boy or a girl!
(I know I used a sentiment from and old stamp set, my bad! But it was just perfect for what I needed.) ;~}

This birthday card was made using one of the new mini stamps 'A Little Gift' (M1030). Is that just the cutest present?
And, I had to embellish it with the Art Philosophy cartridge that just happens to have a bow that works quite well with it - don't you think? Adding some shiny opaque gems (Z1335) and voila - your done!
 I used Baby Cakes this time with the September Stamp of the Month 'Poster Tidings' (S1309) and made a fun 'Fall' card.
I just love how versatile this paper pack is! I'm sure you will find just as many options for this fun paper pack and I hope you have just as much fun using it as I did -
``
Your next stop on this blog hop is the very talented and creative Melinda Everitt.
Have fun, be creative, and show some attitude!
Thanks for stopping by ~
The blogger in front of me is Pamela O'Connor . Great work Pamela, thank you for sharing your talents. If you got here from her blog, you are on the right track.
We have so many wonderful new products in this Idea Book and I have been having so much fun jumping from one product to another, and one paper pack to another - BUT -
I am totally in love with the new 'Baby Cakes' paper pack (X7073B)! It is so cheerful and fun and so versatile! As you will see, I got a little carried away using it! But I just couldn't help myself.
First of all with the name Baby Cakes it just lends itself to 'Baby' cards! Right?

I used Baby Cakes polka dot paper on this card along with some embellishments made from our new 'Artbooking' (Z1906) Cricut cartridge. What a fun cartridge!!! Don't you just love that darling Giraffe? So so cute - and can be used for a boy or a girl!
(I know I used a sentiment from and old stamp set, my bad! But it was just perfect for what I needed.) ;~}
But . . .
What if you don't have any babies right now to make cards for??
Well . . .
Baby Cakes can make adorable birthday cards too!

This birthday card was made using one of the new mini stamps 'A Little Gift' (M1030). Is that just the cutest present?
And, I had to embellish it with the Art Philosophy cartridge that just happens to have a bow that works quite well with it - don't you think? Adding some shiny opaque gems (Z1335) and voila - your done!
And since I just couldn't stop! (I love this paper!)

I just love how versatile this paper pack is! I'm sure you will find just as many options for this fun paper pack and I hope you have just as much fun using it as I did -
``
Your next stop on this blog hop is the very talented and creative Melinda Everitt.
Have fun, be creative, and show some attitude!
Thanks for stopping by ~
Friday, October 19, 2012
 This weeks blog challenge was to post a Halloween card! How fun is that? So I am going to post two pictures (actually 3) of the cards I have made this week. The first one is a darling circle card we made at my friend Shelley's Gathering the other night! It was so fun! Is that just the cutest little ghost you have ever seen?
You can tell I like him because I used him on both cards :~)
I would love to give credit to the creative lady I got this next card idea from but I cannot remember which blog I found it on! Shame on me!


Have fun making your own Halloween cards -
Trick - or - Treat!!!!
Thanks for stopping by ~
Tuesday, September 18, 2012
 |
| Pretty, but kind of plain ~ |
Here is a little pumpkin that I decorated with gold leaf. I like that it looks old and a little tattered - fits me. I used my CTMH Artiste cartridge and added some pumpkin leaves. I crumpled them up and added some gold leaf to them too. It just added so much to the pumpkin!
I put it on the table and decided it needed more!
 |
| Much better with the Fall colors |
More gold leaf???
Noooo - just more!
So I got in my closet, found my fall leaves and berries, set the pumpkin on top and voila! I like it so much better.
I hope you like it ~
Thanks for stopping by ~
Saturday, September 15, 2012
Stamp of the Month - September
Welcome to our monthly Stamp of the Month Blog Hop! On the 15th of each month we will be showcasing the current SOTM set with various projects created by talented Close to my Heart consultants. If you are visiting from Pam Stewart's then you are on the right track, if not please start at the beginning with her!
For all you fall lovers out there the "Fall Favorites" (S1209) will surly catch your eye! This stamp set will turn out to be one of your favorites, especially after you see all the wonderful artwork done on this blog hop.
This is my creation! While I was in the studio gold leafing a pumpkin for my fall table I remembered a fun technique taught by Jill at Stamp Paradise (now closed, so sad). The cute little pumpkins in this stamp set worked out great for this technique.
 | |
| S1209 - Fall Favorites - September Stamp of the Month |
The little 3x3 card is made using the same pumpkins and our fun new alcohol pens.
Thanks for stopping by -
So thanks for stopping by -
Thursday, September 13, 2012
 |
| Here it is on my wall |
ps. . . I'm sure you will all be more careful with your hot glue than I was - ouch!!!
 |
| And here it is on my door |
Monday, September 10, 2012
Blog Challenge - Make it From Your Heart Volume 1
Our challenge this week was to take a card design from the Make it From Your Heart - Volume 1. Close to My Heart's newest how-to publication. It is small and easy to carry with you, and packed full of beautiful designs for scrapbook pages and cards.
 My two designs are Pattern #19 on page 42.
The FALL card is made with the Stella (X7147B) paper pack, the Burlap Ribbon (Z1760), Cocoa and Colonial White card stock and Glamour Lowercase (D1522).
The NOEL card is made with the Pear & Partridge (X7162B) paper pack, the Silver Shimmer Trim (Z1799), Olive, Cranberry and Colonial White card stock. (the font is from a discontinued set - but worked well with this card)
Thanks for stopping by ~
 My two designs are Pattern #19 on page 42.
The FALL card is made with the Stella (X7147B) paper pack, the Burlap Ribbon (Z1760), Cocoa and Colonial White card stock and Glamour Lowercase (D1522).
The NOEL card is made with the Pear & Partridge (X7162B) paper pack, the Silver Shimmer Trim (Z1799), Olive, Cranberry and Colonial White card stock. (the font is from a discontinued set - but worked well with this card)
Thanks for stopping by ~
Subscribe to:
Posts (Atom)